THE POINT 7 PRODUCTION JOURNEY
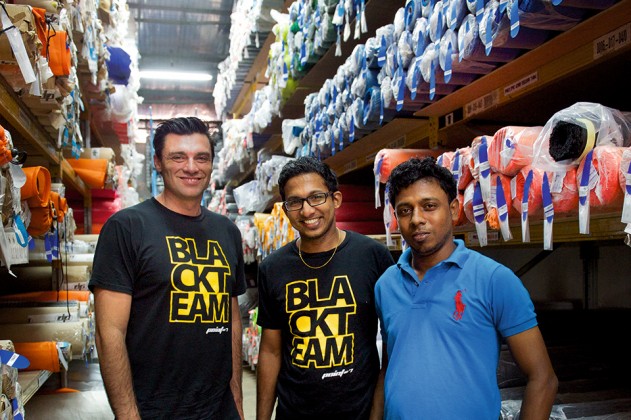
Have you ever wondered how many stages go into the manufacture of your sail before you roll it out for the first time on the beach? Andrea Cucchi gives us an exclusive behind the scenes look at the production facilities used by Point 7 in the Aquadynamics loft, Sri Lanka.
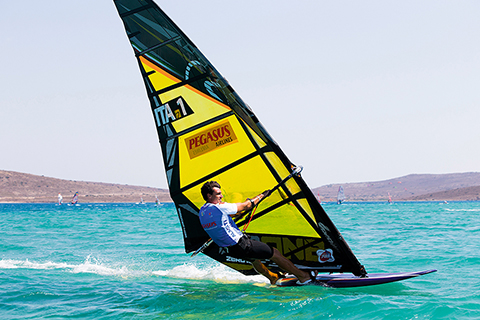
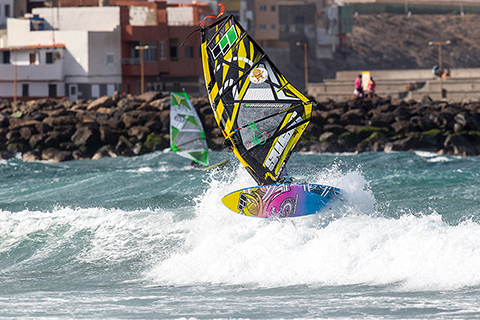
Words Andrea Cucchi // Photos Andrea Cucchi and John Carter / pwaworldtour.com (action shots)
(This feature originally appeared in the November Descember 2015 issue of Windsurf Magazine. To read more features like this first, Print and Digital subscriptions are available. Prices include delivery globally for 10 x issues a year!)
TESTING TIMES
There are a lot of steps to arrive at the point that a sail can be rigged on the beach to plug and play and enjoy all the great feelings we have when windsurfing and herein I hope to give you an insight of the production process. The production of a sail starts at the development. This is usually directed by the feedback of the clients who use our final product and of course, the top PWA pro riders who test the gear to its limits and sometimes beyond!. After hours of testing on the water, jetting around the world to discover different conditions, flying to events to be with the riders, jumping on the race course to test, simply sailing with recreational windsurfing friends on a daily basis and meeting with dealers and distributors, finally the whole feedback is put together. The sail is designed on CAD files, graphics are defined, material organized with suppliers from different parts of the world, samples to test, test, and test again, by doing all what you just read over and over again.
TALKING NUMBERS
At the point when we are all smiling and positive results are happening on the water, it’s time to confirm production. When the production facilities receive the final patterns and files of the new editions, their work starts. Generally a brand has 10 sail lines with an average of 8 sizes each. This means having to deal with around 80 different models. Any idea how many pieces a sail is assembled from? A race sail has over 200 patches without counting hardware components, battens, and rubber protections, otherwise it is closer to 250-300. Multiply 250 by 80 models, that means 20,000 different parts. Everything has to fit and it is not like you just press the button with the file of the sail, and the sail comes out ready. The production of a sail range is an extremely complex process and there is no room for error.
STEP BY STEP
Each file is checked by experts in the production process to verify any mistakes in the patterns given. They study all the parts to see if there are any which will be difficult to be produced due to prints, assembly or anything else.
GRAPHICS/PRINTING
The graphics are sent out to the print department in the production facilities as they have to plan out all the screens. Each print has to fit the size of the sail. The other thing to take into consideration is that the graphics can be really cool, but is it really possible to print everywhere? Not always due to the materials. Different solutions need to be found. The colour also has to match on different materials and therefore the shade might need to be changed. The graphical patterns printed through different panels and materials need to be in line, and this is not another quick job, as panels have shaping in them. Sail sizes are not just simple scale downs as there are fixed points, such as the boom opening and clew, therefore each graphic has to be completely re-drawn on each size. So let’s say there are 30 prints on one side of the sail, this has to be multiplied by 2, as there is a port tack and starboard tack, especially when using black monofilm which is not see-through. Times these by 80 sails! = 4800 prints! That is the staggering but true number of graphic screens that are needed each season in a sail range!
NESTING
Going back to the technical drawings, once everything is checked, the various pieces are separated according to the materials and nesting is the next part. Nesting refers to the process of laying out cutting patterns to minimize the raw material waste and is like playing tetris!. The rolls of material are generally not higher than 1.40m. So the patterns of the sails and all the pieces need to be cut to fit in that height. There are computer programs that can manage this, but it is more efficient when done by hand.
THE PLOTTER
Once the nesting is finished, the rolls of the different materials are placed on the cutting plotters which start cutting the material.
MONOFILM QUALITY CHECK
Each material cut is checked to make sure that the cutting is perfect, and that the monofilm has no production defects. After being cut, the material is checked again piece by piece to make sure that there are no scratches or dings.
PROTECTING THE MATERIAL
Each material cut, is covered with super light paper and tape, to protect it from scratches. The paper is cut manually to fit the size of each panel. The monofilm, before being assembled to become a sail passes through around 177 people. If a single person were to make a sail it would take around 597 man hours per sail in a normal production run with all the graphics, care and checks. A sail designer working alone and without the need to put on prints or other detailing would normally take a week to produce a sail.
CUTTING
Much of the dacron tape and materials which are just internal stripes or reinforcements, are cut by hand as it’s faster.
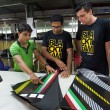
PREPARING SCREENS FOR EACH PIECE
When all parts are cut, they are sent to the printing department. On each piece are written instructions, to make sure that the printing department know exactly what they are receiving.
PRINTING
Before we were talking about how many screens there were, but let’s say that one panel has 4 colours. The same panel has to be screen printed 4 times for the 4 different colours. Each colour needs 4 hours to dry. This means that to finish one panel on one side, it takes 16 hours. When you have to print both sides, it means 32 hours in total!
PRINTING QUALITY CHECK
When each part is finished printing, they are sent to a department which checks again for quality and to make sure the panel is looking perfect, otherwise it
is discarded.
BATTEN SELECTION
The batten department never sleeps. The machines that produce the rods and tubes are working 24 hours a day. The average is 5 battens in each sail and each has different lengths, materials, constructions, stiffness and set ups. The work to assemble, cut and grind the battens is all done by hand.
“ If a single person were to make a sail it would take around 597 man hours per sail ”
SAIL BAG
As the sail is being printed and battens are being made, there is a totally different department taking care of the sail bags. Do you think making sail bags is an easier than a sail? It still needs printing and each bag has personalized prints according to the size of the sail, and the graphics need to fit all different boom lengths of sails. It has zippers, in built protection, different materials, and therefore nesting, cutting and the whole procedure is the same as for a sail.
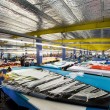
STITCHING THE SAIL
Once all the parts are ready for assembly they are all brought to the last department. This is where the sail is assembled. There are 8 different teams, each specialized in different sections. It starts with the assembly of the panels on one side, and with the assembly of the mast sleeve on a different side. Once the parts are assembled the stitching starts. It’s a very precise job, as a 1mm mistake in joining the panels gives a different profile and leach opening, so the staff has to be fully focussed when doing this to perfectly match each part.
STITCHING THE MAST SLEEVE
The mast sleeve requires a huge amount of work as well. On a formula sail there are many patches, actually combined they are the size of a small wave sail. There are thick reinforcements which need expensive and heavy sewing machines which cost over 30,000 euros.
STITCHING THE BATTEN POCKET
Once the batten pockets are prepared, these are the first components to be stitched on the sail.
ASSEMBLY
Then for a race sail the most important and difficult part begins. The assembly of the mast pocket to the body of the sail. It has to be done gently and to make it perfect is not simple. It’s an art. Once assembled it goes to the final table to be stitched.
FINAL STAGES
At this point the sail is made. Remember that 220 pieces have been put together until now by hand and 180 people have touched your sail. It has passed through 5 different departments and landed on 30 different tables, left to rest on many different shelves, rolled 30 times, and the monofilm has not one scratch or ding. Did you ever try to roll or lift up a sail with no battens? Or played with a piece of monofilm 1m by 1m. How long does it take you to get the first scratch on a sail? It’s a miracle how in production the sail comes out without any damage at all. There is so much care and love for the work done, it is truly amazing to see. As I said before, each piece of monofilm is covered with paper when transported from one table to the next. To work on the sail, the paper has to be taken out, and immediately after, is put back on with tape. It’s incredible when you see all the attention to detail with your own eyes.
FINAL STAGES
These are the final steps. The sail is then taken to a table where all the extra thread is burned and cut.
EYELETS
On to the next table where the sail has the outhaul eyelets put in.
POLISHING
The sail has no scratches, but a lot of finger prints. So it goes to the next table, where it gets polished with coconut oil to remove the finger prints and notes.
BATTENS
The sail is ready to have the battens and cams placed in.
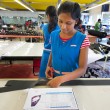
FINAL CHECKS
The sail is ready to be completed, by being screened on the table of the quality manager. He goes through each single detail checking that nothing is missing, or out of place and that all is clean and smooth. The sail is rolled with extra paper and foam to protect it from being scratched during transport, stickers, gadgets, spare parts are all added and finally all put in the sail bag.
PACKING
The sails are than single boxed, each box has the serial number of the sail, and all the info that goes with it. All is ready to be shipped in the container and ready to go by air or by sea and clear customs in the various countries we distribute in.
JOURNEY
How many kms more will the sail do? How many hands will be involved before it reaches the customer and goes on the water? The answer is many! Every year, new patterns are developed therefore more nesting, the graphics change so new screens, innovations are introduced for hardware and materials and new moulds need to be built. The evolution of sails is a lengthy and ongoing process! So the next time you unroll a sail for the first time at the beach or on your lake, just think for a moment all the stages it went through before it can finally hit the water! Have Fun! Andrea Cucchi.