JEM HALL
MOVE ON UP – WINDSURFING TECHNIQUE
GYBE TALKING
I hope the light wind skills and drills have been beneficial and enjoyable and that you’ve been putting them to good use as a long side these and my ‘Holy Trinity’ Stance article you will be putting many of these skills to great use in your quest to survive and thrive in that oft-held thing of beauty – the Carve Gybe.
Words Jem Hall // Photos Dave White & Nick Jones
www.jemhall.com
Many people come on my clinics and want to both learn and improve their gybes and more often than not we spend a lot of time working together to improve their basic fundamental skills and their stance as this puts them in the best position to nail their gybes and take them forward. For those of you believing you can gybe and now placing less focus on this move then please read on as great gybing leads to amazing riding.
As I’ve just returned from Punta San Carlos (PSC), Baja and its amazing conditions of deep down-the-line frontside wave-riding joy, yet again, I can reflect that the best gybers are the best riders! Therefore, perhaps it’s time to set a new standard in your gybing and know that the (step) gybe skills you build have a huge transference across to competent wave riding and also can help you acquire new and fun aspirational moves like the duck gybe and the carving 360?
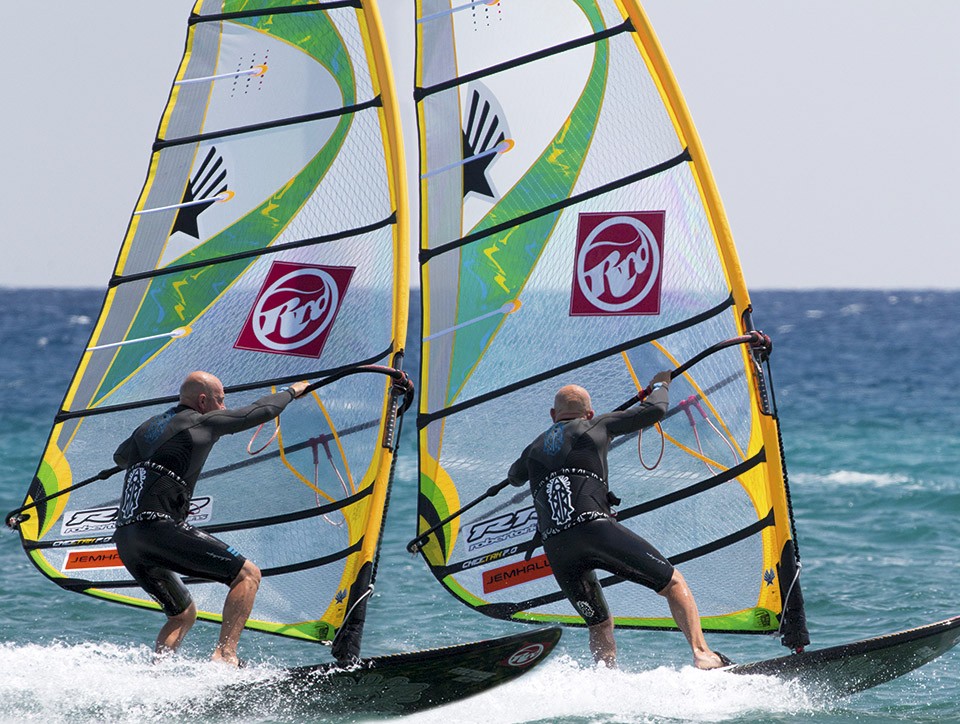
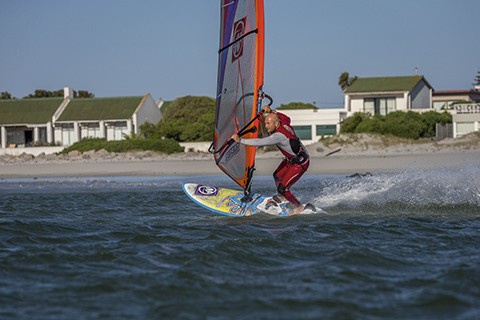
// Get low – pull down on the boom and scissor the board downwind. Photo Nick Jones
This piece is going to cover the main tips and skills in order to allow you to make progress in the carving step gybe and implore you to focus on its key areas – which are: Preparation, Carve, Transition and Exit. You can really only focus on one stage at a time and it’s important to understand that you should target improvement in one area and see that as a success as you enjoy the challenging journey to carve gybe Nirvana. Read on through this piece and really take the time to visualise and understand each tip, close your eyes and see what’s going on and focus as you see yourself performing these skills. In a psychological context this is seen as ‘Visuo-Motor Behavior Rehearsal’ and it cannot be understated just how effective this is and that you should know the mind is the most powerful ‘muscle’ in the body. As ever, focus, believe AND enjoy!
PREPARATION
By failing to prepare you’re preparing to fail and you’re all already winners in this area as you’re tacking, to keep you upwind and give you a breather and can also demonstrate the skills trinity of planing early, sailing fast and flying upwind (see previous recent articles on this). If your target is to learn or improve your gybes then focus on these skills A LOT.
People write to me or come on courses and say “I’ve a problem with the mid/end of my gybe and this is all that needs polishing” and more often than not both for them and me it’s the beginning that really needs to be examined, focused upon and, through setting targets and effective (self) coaching, improved upon.
My golden tips are, some of which will also help you in other moves like, for example, forward loops and wave rides, for the preparation phase of the carve gybe are:
• Backhand waaay down the boom: This should already be actualised from your low-wind skills and drills. Aim to hit the boom clip on a 140 – 160 boom. I ask my rippers time and again what is the most important technique in the gybe/forward/heli tack/bottom turn, and they get used to answering the opening statement.
• Front hand back on the boom: In close proximity (next to, ah go on) the front harness line. This should be first, but backhand back is the headline tip!
• Get low before unhooking: Think ‘arse in the water’ and harness lines tight like piano strings. This commits you to the sail’s power, keeps speed and facilitates easy unhooking
• Unhook by bending your elbows from your low position: Do this and you stay low and upset the board less. Raise your hips and stand up and the kit stands up and you go slow. Speed is your friend!
• Hang off the boom on extended arms and keep pulling down on the boom from your low position: This keeps the board flat and you away from the rig.
• Back foot back and on the rail: The back foot can come out pre-bear-away (or during) but keep low as you position it and look to get it in the middle of the board first and then move it across to the rail right next to the back strap.
• Scissor/steer the board into the gybe: Turn the board downwind (bear away) by pushing through your front leg and pulling through your back leg to gain speed. This lightens the sail through more speed and readies the rails to be carved smoothly.
• Practice and do all of the above and you’re on the right track and you can even approach them as individual skills to work on and then afterwards continue sailing along. Go on, I dare you …
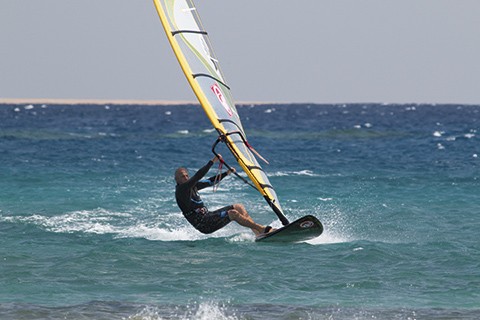
// Subtle catapult in and then roll into the carve. Photo Nick Jones
CARVE
‘You got to roll with it’. The carving phase of the gybe is almost a misnomer as it represents quite a small portion of the whole arc and you’re actually only carving momentarily before you’re into the mid part and then onwards and upwards into your fire exit. Yet, this is where you can really lose all that oh-so-precious speed you’ve built in your effective preparation phase.

Here are the tips for deep-carving joy:
• Catapult yourself forward and across into your carve: Whilst this may sound like insanity if you pull in on the back hand subtly and push the rig forwards and slightly across you it will pull you up from your arse down position in readiness to roll into the carve.
• Roll into the carve: It’s the same action as the previous point, however it’s so crucial that it merits more focus. The rig pulls you up and then into the carve and you go with it, this feels weird at first but hey I did say roll with it. You’re outboard and slightly on your front heel and then you’re coming forward through bending at the ankle and shifting your weight to the ball of your front foot.
• Keep your front arm extended: The rig is away so it drives you and the rig forward and engages all the power down into the turning part of the rail around the middle part of the board. Aim to see the water in front of you. Note: the sail is pulled in with the backhand, but not excessively so until you’re fully competent.
• Front foot into back foot: The pressure in the carve starts on the front foot and then as you increase the carving pressure (through bent ankles) this necessitates moving the focus onto your back foot, thereby readying you for the middle part of the gybe too, hoorah.
Please note all these tips are not exhaustive and there are many more but these are the ones my clients and I feel are the most important and deserved of your utmost attention and focus.
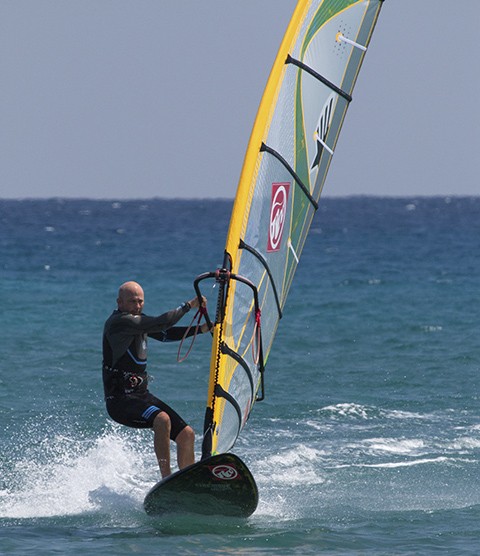
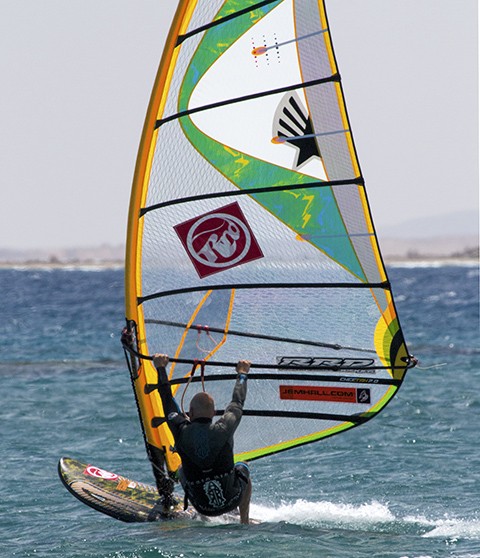
// Rig away and a smooth carve with bent ankles. Photo Dave White
// Back hand waay down the boom. Photo Dave White
TRANSITION
Open up and see the light. A huge part of the familiarity and performance in this part of the gybe should already be in your repertoire from light-wind gybes and the dry gybe drill, therefore let’s bank on these skills as you have been doing these, haven’t you? Again all these tips and more are on my DVD ‘Beginner to Winner’ and on my Vimeo channel too. So, you’ve born away in the prep phase, carved for a second or too and are now approaching dead downwind (a run) and so it’s time to get ready to shift your weight and switch those feet.
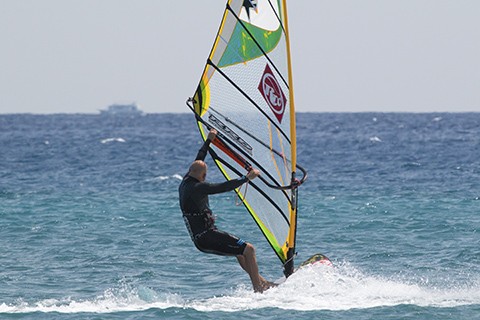
// Back foot back and seeing the clew ready for the foot change. Photo Dave White
Read, visualise and focus on these technique gems:
• Open the sail and see the light: The sail is in and driving forward and then, as you transfer more pressure to the back foot, the sail is opened up by the backhand (in it’s rearward position of maximum leverage) pushing the sail out.
• Swing the hips to the inside of the turn: This is led and aided by beginning to see the clew as you move into this phase. Looking at the clew will move your hips in as the rig moves out and across, thereby shifting the weight to the back foot.
• Rig out and hips in: Get yourself into a counterbalance as the rig moves out and your hips move into the carve. This enables you to carve hard through the back foot (weighting it) and readies you for the foot change / switch. Note: Your hips are to the inside and also back and down.
• Drop and extend: This is a great mantra, both for gybes and wave rides. Drop your rear hip and knee across and into the carve, with your hips back counterbalanced with your arms extended to keep the board flat. All whilst seeing your clew and the exit.
• Toe to heel: The now lighter front foot twists out the strap and switches to the inside / carving rail in front of and very close to the back foot.
There is clearly a grey area here as we move from transition to exit as, once the new front foot is stepping forward, you’re in the exit phase yet still you’re in transition. Damn this move is challenging. Simple tip: get low, look where you go and keep the rig away. Any of these three solve so many issues in windsurfing. Believe!
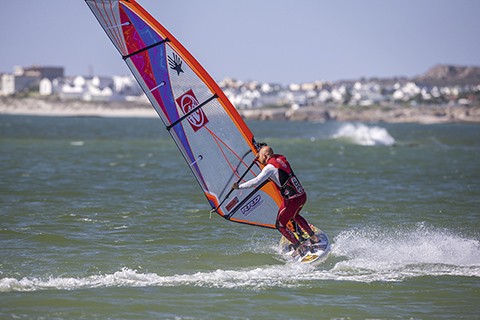
// Get down James Brown and push the board on to the plane. Photo Nick Jones
// Exit and commit low and outboards to the rig clew-first. Photo Nick Jones
TUNING BOX
Lets keep it simple:
• Tight harness: Thereby aiding a fast stance and easy unhooking
• Correctly rigged sail: Set flat enough to cut through the air and behave.
• Right-sized fin: Don’t be over finned or it’s bucking Bronco time
• Generous straps: equals easy carving and foot changing
• Generous lines: equals easy unhooking
EXIT
We’re getting in to the final throes here and, whilst I believe every phase of the gybe merits an article in itself, I will give you some brief tips on the exit as, if the first three phases are not on song, then this will be positioning you either in the water or in a mighty wrestling match with a heavy (full of wind), poorly-positioned sail.
Last nuggets are:
• Bent back leg in, bent back leg out: Keep low as you SWITCH your feet, as the new front foot steps forward, whilst keeping back knee and more so your ankle really bent.
• Keep the rig away: Punch out that backhand and keep low as you continue to see the clew.
• Rig forward, hips back: The clew-first position you’re oh-so-already acquainted with has the mast upright and forward, but your rear hip is kept back so you remain low and able to take some power whilst clew first.
• Take the power: Be ready to take some clew-first sail pull, be low and keep the rig away. NOTE: Get in position with your target as actually planing whilst clew first!
• Slide the front hand: Move your front (mast hand) back down the boom to the mast to ease the rig rotation.
• Send it: Rotate the rig with all your light wind skills
• ‘Get down James Brown’: Once the rig rotation is finished, the rig should be upright with you super low, pushing the board forward and pulling down on the boom.
• Straps and then hook in: When well powered aim to strap up and then hook in. This WILL give you planing gybes along with the previous tip – and avoids catapults. Bonus!
There really is so much going on here and my best tip is to ‘own’ clew-first sailing and rig rotations through light wind drills and, ahem, overseas coaching holidays.
RRD boards, wetsuits, softwear, Ezzy sails and Pro Sport Sunblock sponsor Jem Hall. Get him live and direct on one of his highly-acclaimed coaching holidays, but be quick as they are selling out.. You can also follow him on Twitter / Facebook.