JEM HALL
MOVE ON UP – WINDSURFING TECHNIQUE
RIG TUNING BASICS
WORDS: JEM HALL
PHOTOS: NICOLAS JONES
In keeping with summer, the high season for newcomers to windsurfing, we go back to basics this month and look at the fundamentals of rig tuning. Getting your rig to its optimal state is all about finding a base to work from and then tune, experiment and reflect from there. This piece is not going to disappear off in a haze of luff curve, flex response time and other fancy jargon, but rather provide you with the basics that I have seen benefit hundreds of people I have coached.
The main areas we will cover are: harness line length, spread and position, boom height and the main trimming variables of both outhaul and downhaul.
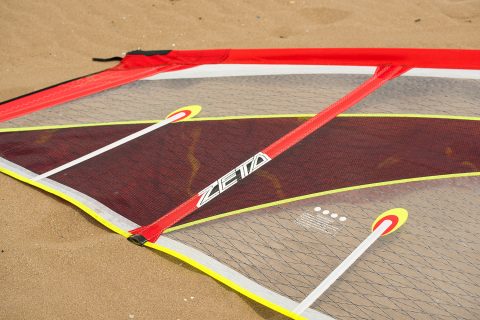
3 CORNERS AND 3 SIDES
When I am coaching, I love to ask my people questions, engage them and help them become better at self coaching, so they can continue to ask themselves questions and the progression continues. One of my favourite questions is what are the names of the 3 corners and 3 sides of the sail?
For corners, the bottom corner is called the tack, the top corner is called the head and the back corner (where you look mid gybe) is called the clew.
For sides, the bottom side is called the foot. A freeride sail has a low foot to help keep power down low for blasting, whilst a wave sail will have a higher foot for manoeuvrability. The leading edge of a sail is called the luff, with the mast going in the ‘luff tube’. To luff can also mean head upwind or sheet out. Opposite the luff, is the trailing edge, known as the leech.
-
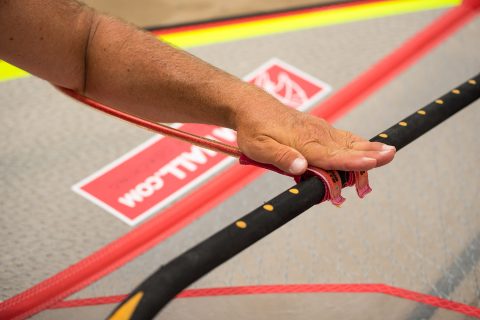
- Put your elbow in the loop and the end of your palm should touch the boom for generous length harness lines.
HARNESS LINE LENGTH
This subject can be very contentious, but I advocate long lines so the sail can work with you and you are in a position that is fluid and in balance with the sail’s power. A greater distance from the rig in a straight line means you are more likely to maintain this in a move and so have a higher likelihood of completion. Longer lines also facilitate easy hooking in and out, which will smooth out your transition entrances and exits. Longer lines also get the rig more upright and therefore more efficient. The best way to embrace long lines is to sail one handed, as you have long heard me champion. Please note it is not too long a line that causes you to unhook, it is raising our hips and bending our arms in, a common ill in windsurfing.
The measure I use in the picture has worked with hundreds of sailors and utilises your actual forearm length, as people can be tall with medium arms or shorter with long arms. Try it out and if you are going from short to long then you can transition gradually into the length if you so wish.
-

- Correctly positioned lines means you can lift the rig with a finger whilst it remains balanced.
HARNESS LINE POSITION
Your front harness line position depends on the type of sail and size of sail. A bigger sail has the power point further back, and where the sail pulls from will also move further back as we get more powered up. Some sails and brands of sails have a more aft power point and some more forward, so get some intel and find out what sort your sail is and reflect too on where the sail is pulling from.
Here are some ways to find your front line position, but please know that this position is best felt on the water sailing along:
- Go hand by hand down the boom, starting at the front, and at around 5 hand widths for a medium sail, 6 for bigger, you will often be on the money. Do the same on both sides of the boom and then go out on the water and see where the pull is coming from and shift your lines a few cms in the relevant direction. So if the pull is more from the front hand, shift your lines forward and vice versa.
- You can also lay your arm down the boom, with your elbow at the front and the tips of your fingers can often give a good starting point for the front line.
- Many booms have markings on them and so you can use the dots, and note these positions. One of my booms is 3.5 dots for smaller sails, 4 dots for medium sails and 5 dots for 6.5 / 7.0, as an example.
- Lifting the boom with one finger also really works, as in the pic. The power point is where the sail is the deepest and this is also where the sail will balance if dangled and you can then place your lines either side of that point.
-
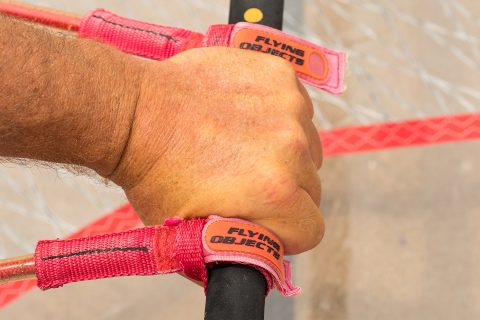
- One hand width apart should be your maximum spread, with many favouring narrower.
HARNESS LINE WIDTH
When coaching I encourage people to ‘feel the rig’ and this is easier to achieve with our hands closer together. This also means you can get the rig further away from you, more upright and your hands very close together for sailing upwind and top turns in wave riding as an example. I favour one finger apart, other people 2 – 3 fingers apart, but the max should be only a palm’s width. Why I hear you cry, well too wide means the front hand creeps forward (decreasing the power from the rig) and the backhand creeps back, where it can oversheet the sail when getting planing or hitting a lull.
-
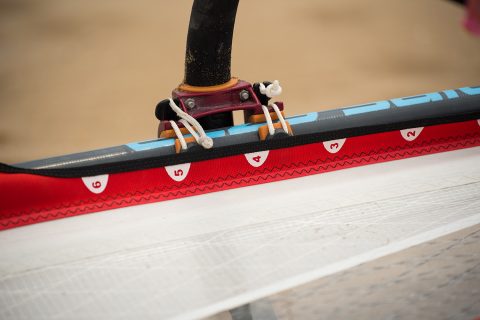
- This is very much a personal preference!
BOOM HEIGHT
This is very much a personal preference, so here I will just advise how to place it at a consistent height and how best to measure this height.
- Refer to the boom cut out as many sails have numbers on their cut out. Beware that some sail brands have high boom cut outs and some lower, so find what works best for you. On my Ezzy sails I know position 5 is high, 3.5 is low and 4 is around medium.
- You can also use the tail of board and see how many fingers the boom is off the tail when the rig is laid down next to it with the mast foot attached. One finger off or on the tail is low and a hand width or more is getting high.
- You can also stand next to the rig on the board for a guide, with armpit being low, shoulder being medium, neck height being high.
It is important to understand the effects of boom height on your sailing:
- A higher boom or moving the boom up produces power and helps you get planing.
- A lower boom, or moving the boom down, gives you more control.
- Moving the boom down also helps with moves and wave riding, but will challenge you more in your planing.
- Note that if the boom is too far up, you won’t be able to bend the back leg enough to get planing comfortably.
- Boom heights, in general, have moved down.
- You would be surprised how much more control you have when very overpowered if you move your boom down and also how just raising your boom slightly will help you get planing in marginal condi
DOWNHAUL
-
- In essence a well tuned sail will have more shape further down, going to less shape and flatter in the head. Too much shape / fullness in the luff tube near the head often means not enough downhaul.
Downhaul (DH) has a major effect on a sail’s power and control, so adjustments to DH should be very small. More DH gives more control as the sail is set flatter. Less DH gives more power as the sail is fuller and produces more lift. Don’t be frightened to really experiment at the ends of the spectrum. I have set my wave sails very very full for float and ride and very very flat when maxed out. My own preference is a slightly flatter set sail as it is better in moves and I compromise on planing with this, but get the benefit of the sail being lighter through the air.
-
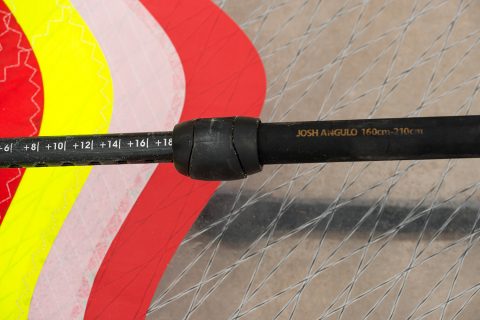
- Use the boom length, or just under, that is quoted on the measurements.
OUTHAUL
I must admit I love tweaking the outhaul (OH) to get the best out of every session. You can make your changes in the shallows, or out the back in a wave break and benefit immediately from more control or power. With it being so easy to adjust it is surprising how few people tune it. Often when coaching we do a feedback loop and people say they were overpowered and I ask them what did you do about that? Sometimes, if it is manageable, I enthuse them to increase their outhaul so they can stay on the same sail if it is cutting up rough and just tough it out and learn to be ‘comfortable with being uncomfortable,’ and often after 20 minutes of crazy times the wind drops back down anyway, so a sail change would not have been beneficial.
Therefore my main tip here with OH is to get used to changing your outhaul on the beach, in the shallows and even in deep water. This stops you having to change sails as much so we get more water time. It not only gives you more control when you tension the OH but it can also give you a big boost in power if you ‘relax’ it too.
RRD boards, wetsuits & softwear, Ezzy sails & Black Project fins sponsor Jem Hall. Get him live and direct on one of his highly acclaimed coaching holidays, but be quick as they are selling out – check out his website www.jemhall.com for more details. You can also follow him on twitter / Facebook / Instagram.