Words Peter Hart // Photos Hart Photography, John Carter
Originally published within the July ’18 edition.
Now you’ve got it up, the fun is just beginning! Harty, well aided by Sam Ross and Tris Best, looks at the next level of foiling fun – tuning.
Well isn’t this well timed? Since part one of our foiling directory, we’ve been greeted by the fabulous news that not only is windsurfing to remain in the Olympics for Paris 2024, but there’s a chance the RS:X will be replaced by a craft with a foiling option. It’s not like foiling needs a certificate of approval but we could potentially get a really big one with knobs on. My mouth waters at the prospect of it transcending the converted audience and thrilling radio jocks and breakfast TV presenters in the same way as Boardercross did when it was first introduced into the Winter Games. “Did you see the windsurfing yesterday? I didn’t know they could go do that. The speed! They were balancing on a stick. More!”
But let us return to the present and the task of cracking this hugely enjoyable pursuit.
In the last issue we focused on the ‘hows’ and ‘how not to’s’ of rising up and sustaining flight – and how to reconfigure your natural windsurfing responses in order to control and exploit these new forces.
In this next installment, we go deeper by looking at the importance of tuning options. Elsewhere in the magazine both Sam Ross with his ‘pre-flight checks’ and Tris Best with his tests, describe the influence of different designs and setups. I, meanwhile, keep it real and offer a diary of the first sessions with my own kit and how small adjustments made a massive difference in varying conditions.
I finish by suggesting how foiling can breathe new life into your regular game.
It Is about the kit
‘I’m not very good so it doesn’t matter what kit I have’ remains arguably the most misleading statement in equipment led sports and is especially rubbish when applied to foiling.
And the time when it’s most misleading is when you’re in the ‘ugly zone’ – that is to say the cognitive ‘try, crash, repeat’ phase – because that is when your confidence is at its lowest and when you naturally blame personal incompetence rather than external factors like tools.
In normal windsurfing mode, if your peers are planing while you’re grinding through the water like a snowplough through treacle, you would immediately return to shore (wouldn’t you?) and hatch a plan to get the sail to produce more efficient power and to lighten up the board – boom up, more downhaul, mastfoot back for example. You wouldn’t just plug away and pray for a miraculous change in fortune. You need that same mindset foiling, and the sooner you relate comfort, sensation and performance to foil design and the size and setup of board and rig, the more rapid and joyful your progress will be – especially when you invest in your own kit.
The first phase of ownership
Buying your first windsurfing kit and your own foil can be like leaving home – you love the independence, but to your horror you realise your mum’s not there to do your washing. You may have plumped for a radically different foil to the one you learned on and your savvy instructor is no longer on hand to hold your hand and tweak your variables. So now is the time to sensitise feet and hands and then keep moving things around until you feel some level of comfort and stability. Little things can make a very big difference. It’s a task best illustrated with real history, mine as it happened, starting with the thought process behind kit selection.
“ Nick Dempsey – “Having not been on a windsurf board for 18 months and with no desire to ever go near one again, I now find myself looking out the window at the trees, checking the forecast and getting excited about a half day gap in my diary! I’ve fallen in love with the sport again. That’s what foiling has done for me”

THE FOILING DIARIES
The ‘what to buy’ issue is a task for another part of this magazine. But fundamentally you apply the same criteria as you did selecting your first normal package – but hopefully this time guided by more general watery experience – like the conditions you’re targeting, whether you demand easy, instant, safe success, or more of a technical challenge – i.e. something to grow into.
Having tried a number of foils I polarised the choice.
At the one end you have the ‘hover’ foils, like those from Naish and Slingshot. With front wings like shovels, they offer massive lift at low speed and with small sails. Success, while not without the odd capsize, comes with minimal adjustment to the regular setup. You can set the straps up inboard and don’t have to get into them to fly (although its better if you do).
They are a brilliant way of providing ‘first flights’ and, with that constant slow speed lift, it’s much easier to maintain flight through the gybes.
The regular windsurfing equivalent would be a 150 litre, sturdy freeride with inboard training straps just a few inches behind the mastfoot and powered by a 5.7 in 15 knots. It’s a combo that offers a very gradual transition to stable, semi-planing; and where clumsy trim fore and aft or side to side, doesn’t immediately ruin your day.
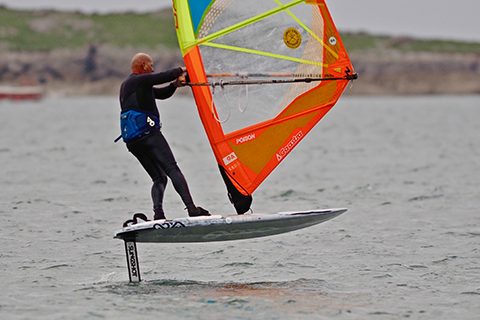
At the other end lie the higher aspect foils. This is where I felt I belonged. Having tried a number of them at Portland under the guidance of Tris and Sam, I felt my speed and slalom roots emerging. I’ve spent a good chunk of my life getting slammed on the speed courses of the world. I’m not adverse to the odd crash and like that feeling of balancing big forces and sailing on the edge. Above all I wanted that fully released, edgy experience in light winds, so I opted for a wide board (95 cm) and the high aspect Starboard GT model. With a wide board you can go for the longer mast and load it up with relatively big sails – it’s all about getting as far away from the foil as you can and increasing your ‘righting moment.’
So we’re rigged and ready. Let the trials begin. What could possibly …?
A warning from the 80s
Back in the early 80s the sport exploded as a professional discipline. But while the pros argued the toss over whether 2 or 3 concaves worked best in their raceboards, the majority of paying customers were still unsure of the usefulness of a footstrap. But thanks to the hype from the top, many were seduced into buying models irrelevant to their skill and general needs. The message here is the same – get on the wrong foil and setup for your standard and you could be put off for life.
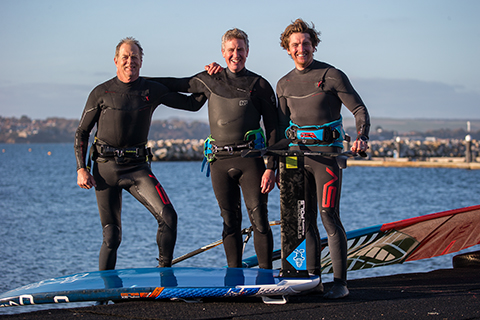
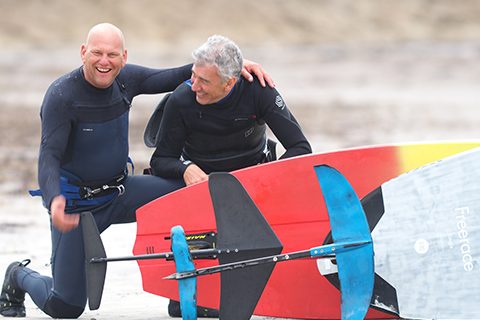
Coaching stalwarts – Harty, Tris and Sam (one with considerably more life experience than the rest), bring you advice from every perspective – the recently initiated, the instructor and the pioneer. Photo – John Carter.
SESSION 1 – (you have to start somewhere)
Wind – gusty 12-22 knots
Where – Chichester Harbour
The setup – Keen to work on my trimming, pumping and early flying I went for a relatively small 5.7 wave sail rather than rely on raw power to get me up. I was also interested to see if the wide board / small rig combo worked in foiling in a way that it doesn’t in normal windsurfing. For example, would the wide board offer too much windage to the bigger gusts and just get blown out of the water?
I found some tiny 26” lines, even shorter than I had used in the light winds of Portland during my training (because that’s what the elite were using).
The sail was set with normal downhaul but minimum outhaul.
Boom height was a smidge above shoulder.
Mastfoot was in the middle.
I set the straps in the most outboard settings, but for a little stability, went for the forward most positions.
Water results
Disaster is a much-overused word, but it’s still the one I’d choose to describe this first session. First of all, there was the bloody weed. I spent the first half hour pumping myself to a cardiac arrest unaware there were 3 kgs of algae bloom hanging off the front wing. And it’s not a case of doing a wee hop or sailing backwards – tricks that release it from a normal fin. I had to don the scuba tanks, dive deep and wrestle it away, in the knowledge that a tiny strand of the stuff is enough to kill the lift.
In open water and weed-free, the test continued.
In the gusts I flew immediately but touched down as soon as I tried to settle down and hook in.
The times I did sustain a little flight I never felt comfortable. I felt too close to the rig with no direct connection with the foil – and I could only keep it up though a lot of back foot pressure. It placed me out of kilter, and in the lulls I would often oversheet and collapse the windward edge.
Post Mortem
With a clearer head and the heart rate near normal, this is what I analysed.
Gusty. Whenever and whatever you’re testing, unstable winds muddy the waters and make it hard to pinpoint any issues. ‘Is it me, the setup or the weather?’ You need a reasonably steady wind and a lengthy reach to give you a chance to feel what’s really going on.
And gusts provoke unconsidered reactions. When they smack a bagged out sail, the back hand loads up. That shock load then gets transferred through the back foot and into the foil with rocket-like consequences. After a couple of those you become understandably defensive.
Tired. Gusty winds (plus weed) sap the energy and with fatigue came lazy habits – notably trying to hook in too early before I got fully flying. And hooking in prematurely to short lines makes you drag the rig back and kill the power.
Too far forward. Having to use back foot pressure to stay up points to straps and mastfoot being too far forward.
Lines too short? During my initial training sessions at Portland, shortening the lines had made a big difference, leaving me upright over the windward edge and able to control the lift – but that was in 10 knots with a big sail. In these stronger, gustier winds, I felt I needed a lot more space.
Conclusion A combination of tricky weather, sea plants and dodgy tuning had made me take a backwards step. But there was a positive – the big wide board didn’t get blown around. Onwards …
SAM HEELED OVER
When it comes to really cranking on the power in search of the top end, the racers are looking ever more like the foiling dinghies, heeled right over to windward. Sam describes the racing stance and setup. “The board being heeled to windward, means that more power can be locked in as it works against the foil trying to right. You can also see the weight shifting forward, as more speed and power equals more lift, so the more you sheet in the further the weight needs to go forward. To be able to heel the board over we still see the same hinge at the waist when first getting sustained flights. The heel heavy stance is then exaggerated until the rig starts to help the rig come over the top. Short lines and a high boom are key in making sure this helps push the windward edge down.” – Sam Ross.
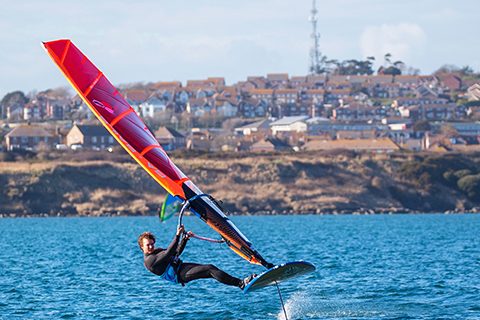
Sam almost horizontal. Photo – John Carter.
SESSION 2 – SO much better
Wind: 10-14 knots. Sail – 7.5 twin-cam.
Where: Chichester Harbour, but in deeper water away from weed.
Setup changes
Mastfoot: I checked the mastfoot setting and went for the standard 110 cm from front mast screw to deck plate, which was about 3 cm further back than last time.
Footstraps: On the port side I moved them to the rearmost positions and left the other side forward. I’ve played this game before and sometimes you can credit a tuning adjustment with a better feeling when in fact it’s just easier conditions all-round. Hence it’s good to have an immediate comparison on both tacks.
Harness lines: I changed to adjustables – 26-32” – and lengthened them to about 28”.
Boom height: A bit higher for the bigger sail – around mouth height.
Water Trials
It sounds a bit glib, but the transformation was instant. Steadier winds surely helped as did the bigger sail, which with its wider sheeting angle, made me less prone to over-sheeting.
Having more energy meant I stayed out of the harness longer and got properly flying before hooking in. And the slightly longer lines (still 4” shorter than normal) allowed me to hold the rig further away and still stand over the rail.
The strap adjustments made a massive difference. On the side where I moved them back (port), I flew up more easily and sustained flight with a more even footed stance. On the starboard side it was still back footed.
Conclusion It’s the British cycling team’s mantra – ‘the aggregation of marginal gains.’ It’s a message that we should take into all our windsurfing. But top of the list were a better rig to board match, a lighter but more stable wind and more energy from the rider – all of which bred comfort and confidence.
THE KNOX METHOD
For 25 years the ever eccentric and golden-hearted Jamie Knox has been running his windsurfing centre on the shores of Brandon Bay in Kerry. Better known as a nutty wave man, he has nevertheless taken to foiling like a duck to the wet stuff and claims he can get any half reasonable ‘windy’ up and flying in an hour. He’s gone for the very high lift Slingshot foil and, as he is wont to do, has developed his own way.
“I wanted something that was easy to fly and easy in the moves – so this one is ideal in 6-12 knots and with a sail no bigger than a 5.6. The hover foil ticked all the boxes. Teaching myself I found it’s not like windsurfing! You have to stand completely upright. In the beginning we tried to use harnesses a lot and things got better when we hooked out. It was trial and error learning. The hover comes up without your feet in the straps but then twists sideways – so I thought, ‘right … put your feet in the straps!’ – then off we went. There’s a beginner mode with a longer fuselage, meaning you can get up standing forward, but we didn’t read the instructions and ignored it!
To teach people I first get them on the beach and show them the angle they’ll be standing at. The main problem is dragging the sail over the centreline, which is why I tell them to stay hooked out and keep the sail open. It’s quite a different technique to regular foiling where you are powered up and using the harness in the normal way. But I have to say, it’s the most fun I’ve had in years. If you’re not doing it, you’re missing out!”
Knoxy in mid gybe. The super low aspect foil offers ample support during the critical stage of the arc. Photo – Hart Photography.
Jamie with his charge Filippo, both favouring hover foils – front wings as big as shovels. Photo – Hart Photography.
SESSION 3 – Open Ocean
With a day to prepare before my wave clinic in Kerry, I took the foil out onto the crystal but undulating waters of Scraggane Bay at high tide. The wind was a light 9-10 knots building to 15 by the end of the session and I kept the exact same setup as session 2. As I prepared for my first run out in swelly waters, I had the advice of Sam echoing in my ears:
“When I started sailing chop, I realised I was consciously getting ready to bend the knees to soak it up – I looked down and said what am I doing? Stay rigid!”
It’s harder to stop being a windsurfer than you think. To begin with, bending knees to absorb chop, even though the foil is well below it, was a tough instinct to quash.
However, on my way out through the bigger stuff I experienced my first involuntary jump/cavitation/crash where the wings released out of the crest of a chop. I found the remedy for maintaining foil to water contact was not through bending the knees, but through leaning forward slightly to lose some height.
It was a great session that introduced a heap of new elements.
Against and with the swells
Initially I found it easier to get flying and stay flying going out than coming back, which is the opposite of regular windsurfing, when the downslopes do all the getting going work for you. Once again, the instincts were all faulty. As a swell approached I’d leave the back foot out and lean forward, which you do to catch a wave, but of course, just sank the foil deeper. To a certain extent it was easier to pretend the swells weren’t there and get going between them, rather than on them.
Pumping
Of all the regular windsurfing habits, this remains for me the hardest one to break. Getting flying or staying up, my instinct was to work the sail in the harness, directing those little pulses of power into the front foot and mastfoot – and absolutely nothing happens. I had to keep reminding myself where the power is coming from – it’s from underneath, not above. Sheeting in and out achieves very little. Instead, hold the rig still, away and open and use it as a counterbalance from which to pump the foil. The legs will get a bigger workout than the arms.
MOVING ON UP – foil height and angle
I have never reached this lofty standard, but in golf I imagine there’s a level of excellence where making a clean contact with the ball is a given, leaving you to focus on details like manipulating the shot to produce a draw or a fade or make it stop dead. In the early stages of foiling you’re at the stage of believing you’re going to top shank the ball through the clubhouse window. You don’t know what’s going to happen and are in the strange position of both craving and dreading the prize – flight. The wonderful breakthrough comes when you’ve gathered enough control tools to both expect and sustain flight and when you don’t expect to crash. And it’s then that the mind can wander to more interesting matters.
Passenger to pilot. To begin with, especially with the high lift foils, you can just stand there – a bit like you did learning to plane, a little unsure of what magical forces were making this happen. But as trepidation slowly evaporates, you can relax and tune into the sensations under your feet. Where exactly the lift point is depends on many things like fuselage length and mast positioning (see Sam’s piece in the mag). Is it under the front foot or back foot? Once you feel it, you can adjust your stance and weight distribution and actively direct more power into the right spot.
Windward canting. The difference between passenger and pilot was immediately obvious when I met Tris and Sam for a training session at Portland. While we were at floating level, they were hiked right out with the board canted to windward like the foiling dinghies. It’s a racy stance that allows you to increase your ‘righting moment’ – i.e. get further away from and get more leverage over the foil. It feels super powerful and stable. And with the front wing canted over it drives drive harder upwind. It’s not possible on all foils – notably those with flat tail wings, which need to be ridden level. Also, it’s obviously more suited to longer masts.
Foil height. What exactly is the aim? Is it to fly as high as possible all the time? Well of course that looks most impressive, but it’s not always the smartest tactic. How high you fly depends on conditions and the design and stiffness of your foil. It’s fun playing with your height, rising up and down by shifting gently forward and back. I’m finding that my GT foil seems happiest and most stable at mid height. I have limited experience on the ‘hover’ type foils, but they seem to want to ride way up there all the time. To avoid cavitation, it makes sense to lower your height a little in chop.
Downwind. Downwind walks of shame are common in foiling because it’s so much more natural and safer to sail upwind. The main challenge is fear though speed. The top tip to sailing downwind is to bring the back foot further forward to reduce pressure through the foil. For me, the first proper broad reach came through unhooking and holding the rig forward, still and open. In marginal winds, there’s so little pressure in the sail downwind that oversheeting and collapsing the windward edge were my most repeated common woes.
Something no foiler has yet embraced is that of getting kit in and out of a weed-ridden shorebreak. A narrow board is easier. Photo by Hart Photography.
FOIL TO BE A BETTER WINDSURFER
To read this magazine, you might think we’ve been taken over by a foreign invader. Foiling is here to stay, but it’s not usurping the sport. It’s a friend not a foe. Approach it in the right way – that is to say stick at it and enjoy the learning journey with all its highs, not so highs and ‘eureka’ moments, and it WILL improve your regular windsurfing in many ways. Here are some examples:
Fear. It’s the greatest inhibitor of all. Supress it and you’re a winner. How often do you really frighten yourself on your regular windsurfer these days? It is all too easy to remain in your happy place. But all improvement, whether it be gybing, jumping, doing tricks or going fast, comes from putting your body on the line and getting that injection of ‘I don’t know what’s going to happen next …’ adrenaline. Flying up on a foil is pretty scary to start with, as is crashing from a metre up. After a few of those, being back on your normal kit feels very tame and you’ll be ready to take it to new angles.
Tuning. Of course tuning is key on all kit – but on non-racy, easy freeride equipment, you can be horribly imprecise and it will still sort of go. The effects of bad tuning on a foil means it just WON’T go. Foiling really heightens your awareness to every aspect of tuning, notably where the lift is coming from and the position of rig and feet relative to that lift.
Micro adjustment. You are balancing on a stick and therefore have to be more precise not just with tuning but also with your body movements. Head, hands, feet, hips – the smallest movements back and forth determine your height and stability. And that’s how the good sailors sail normally.
The reduced counterbalance. The classic mistake of the meaty freerider is over-committing to the rig and constantly relying on power to hold them in balance. You have less power and will get nowhere if you constantly hunker down and heave back. Instead you have to stand taller, feel your toes, let the rig pull you along and be subtler with the pressures, which is the key to speed in all disciplines.
As Jamie Knox quotes … “if you’re not doing it, you’re missing out!”
www.peter-hart.comMore from Harty next month as amongst other things he’ll be looking at the joys of summer WindSUP’ing. Check out all his clinic news and DVDs on www.peter-hart.com